NOTE: We have found that from time to time, the Google Forwarding Number redirects to another number – especially if the ads associated with that number were paused for a period of time. If you’re going to use the free forwarding number from Google, ensure that you know what the number is and periodically call it to ensure it’s working. For this reason, we’ve stopped using this Google service at Harmonised as misdirected calls could mean hundreds, thousands, even tens of thousnads of dollars in missed opportunities for clients if we don’t pick up on an error fast enough.
For clients with lower budgets, we simply make do with tracking telephone link clicks. For other clients who don’t mind spending money for additional insights, we used a paid call tracking service like Avansar or CallRail.
The Google Forwrading Number is one of the greatest tools up any marketer’s sleeve. It’s completely free and it provides powerful data as to how many confirmed phone calls are being generated by your campaigns.
In Australia, this service will mask your existing phone number with either an 1800 or 1300 number. You don’t have any way of knowing what that number is going to be beforehand.
So, how do we set it up?
Setting up the Conversion
First, we need to set up the Google Forwading Number in Google Ads.
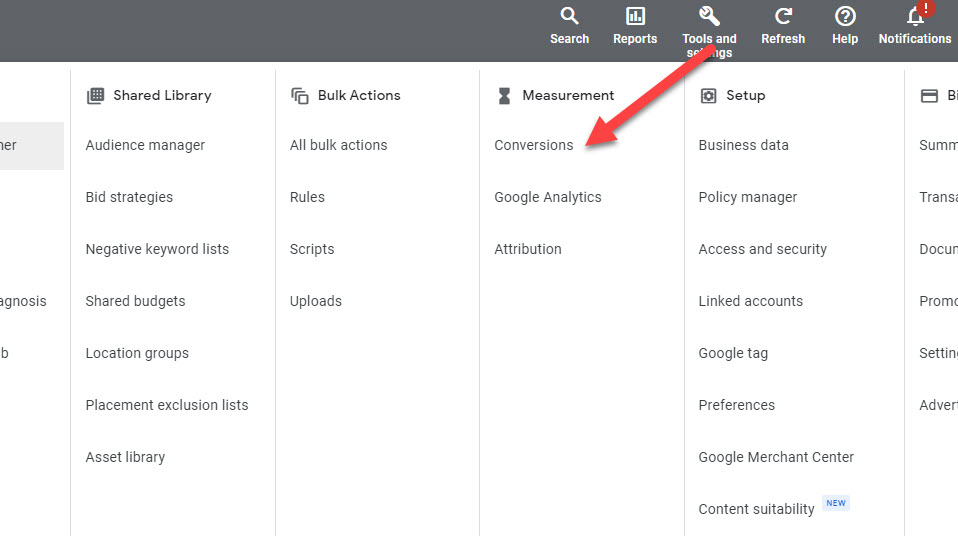
Step 1: Go into “Tools and settings”, then click on “Conversions”.
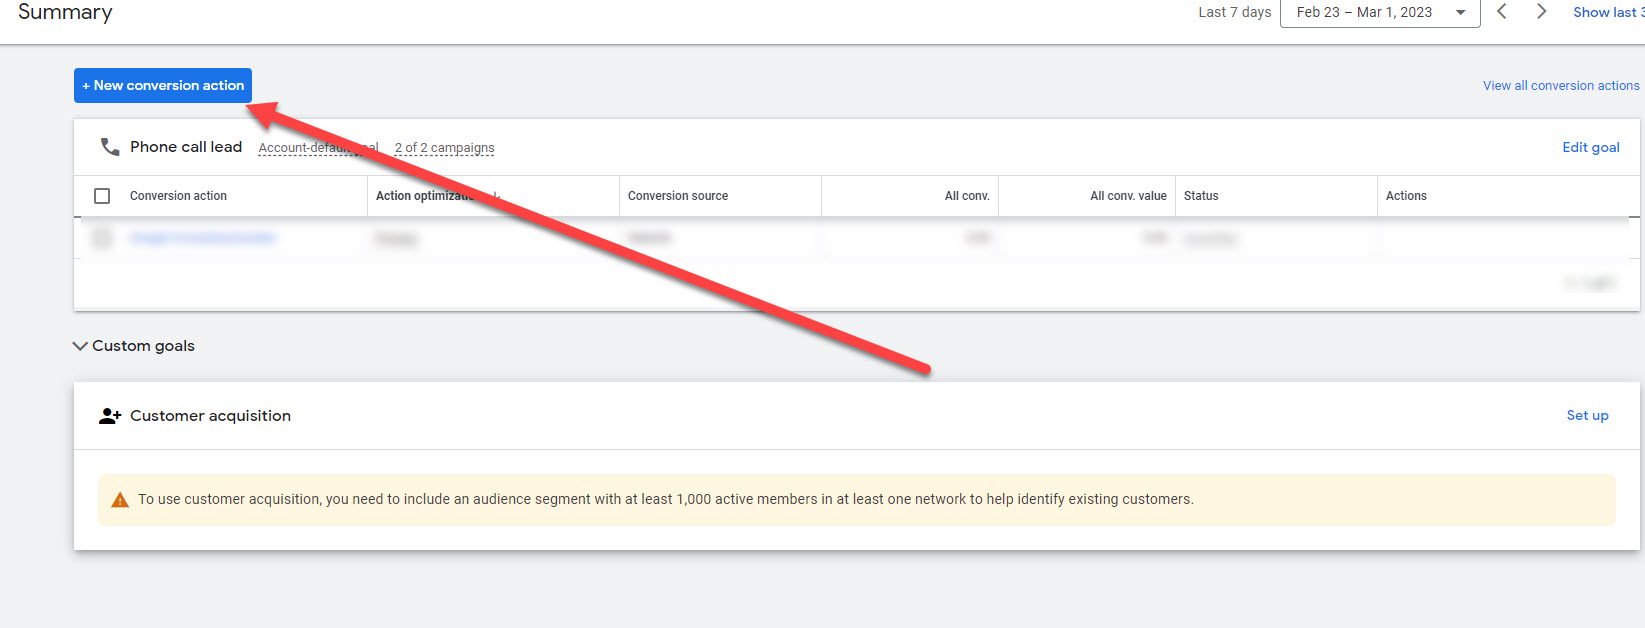
Step 2: Click on the blue button “New conversion action”
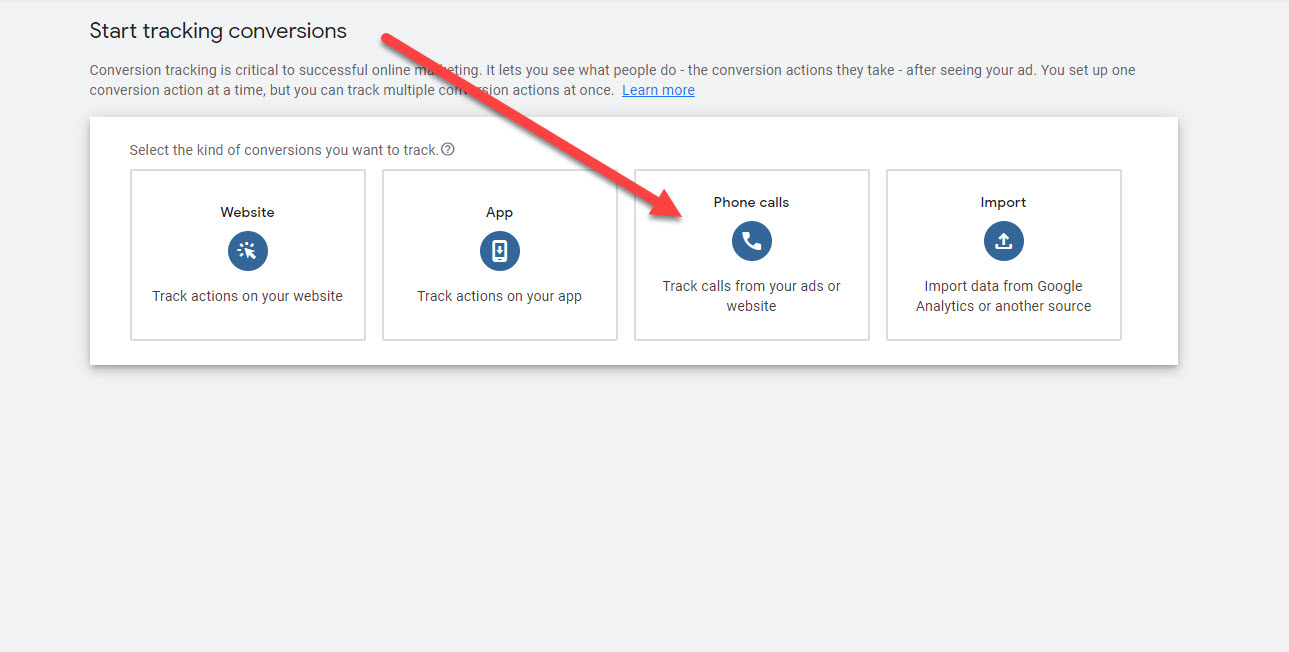
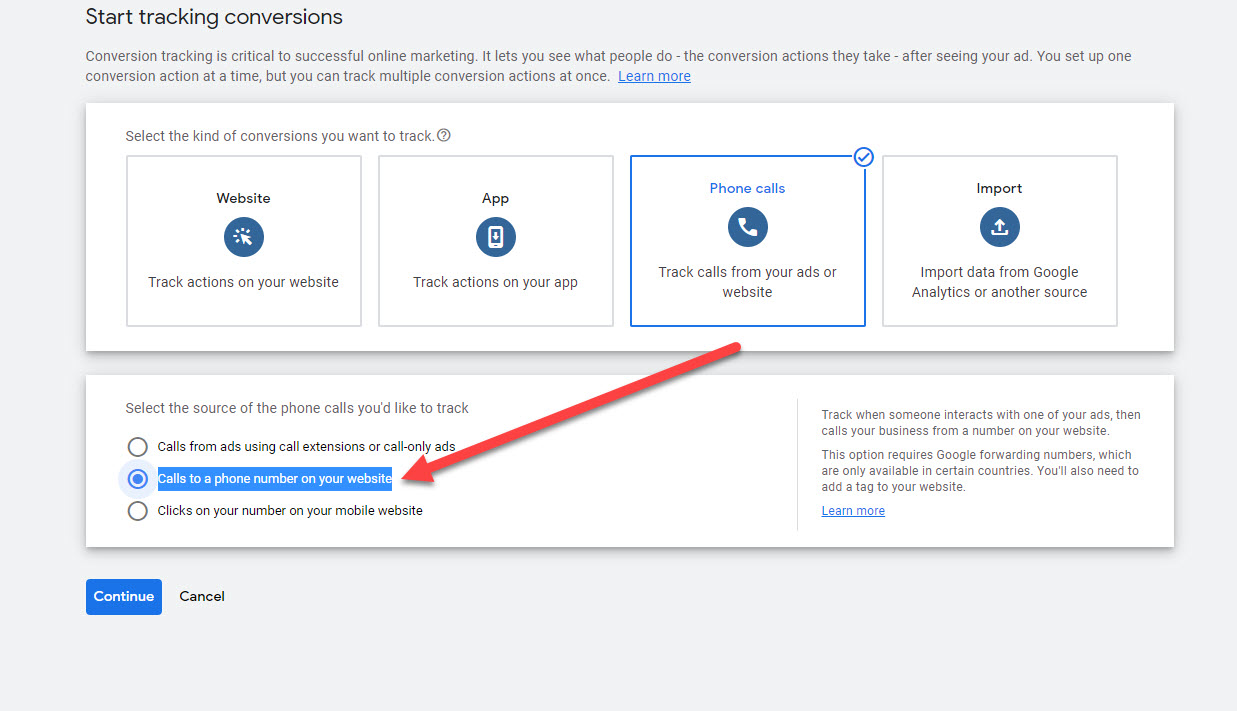
Step 3: Click the “Phone calls” box
Step 4: Select “Call to a phone number from your website” and click continue.
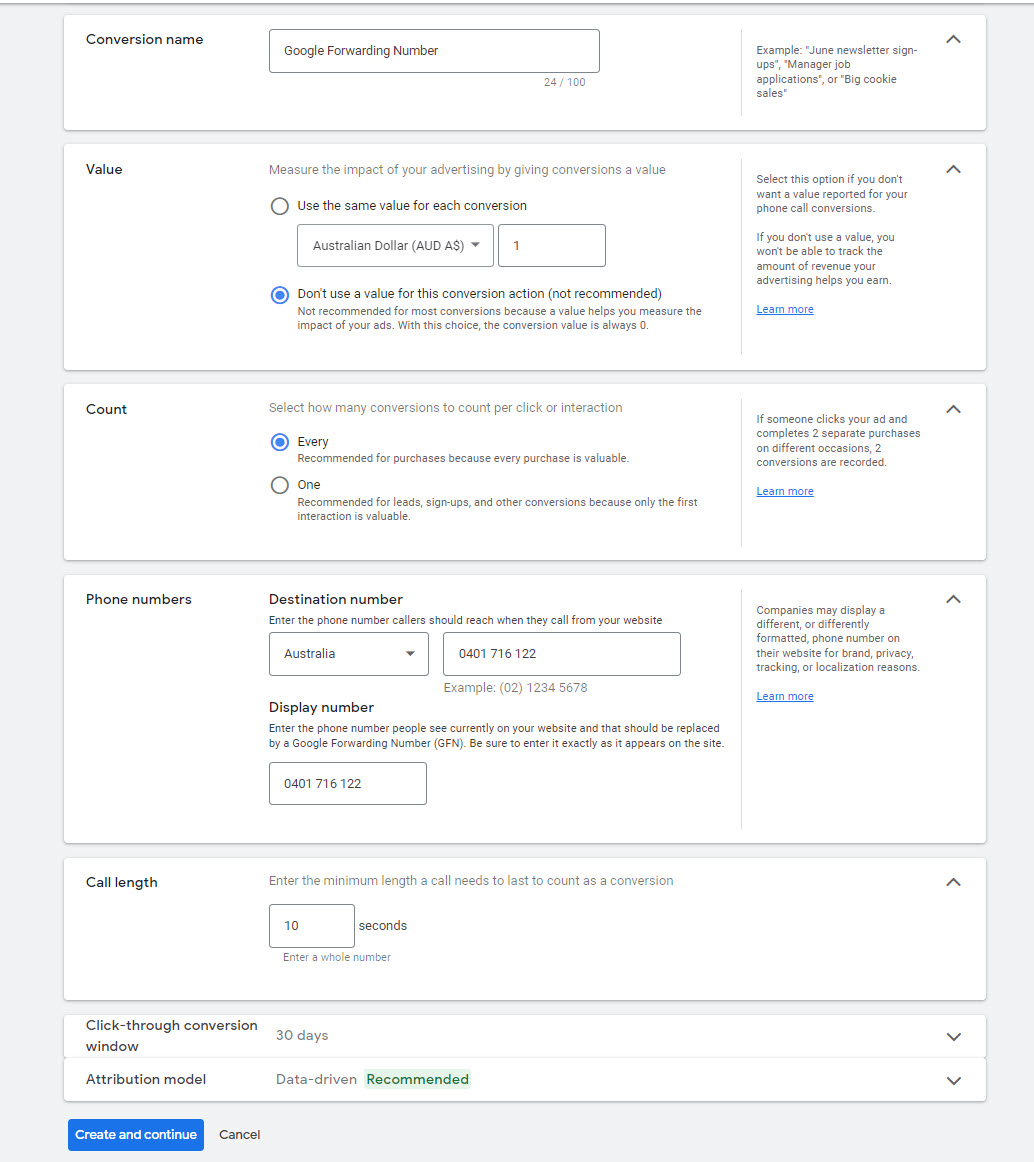
Step 5: Fill in the details for your conversion. You can call the Conversion name whatever you’d like.
Make sure that the phone number matches the phone number on your website exactly.
I personally also like to make sure phone calls are registered after 10 seconds to make sure every call is being registered. The default settings are 60 seconds, which I personally think is too long and can mean that you’re not taking the credit for some calls.
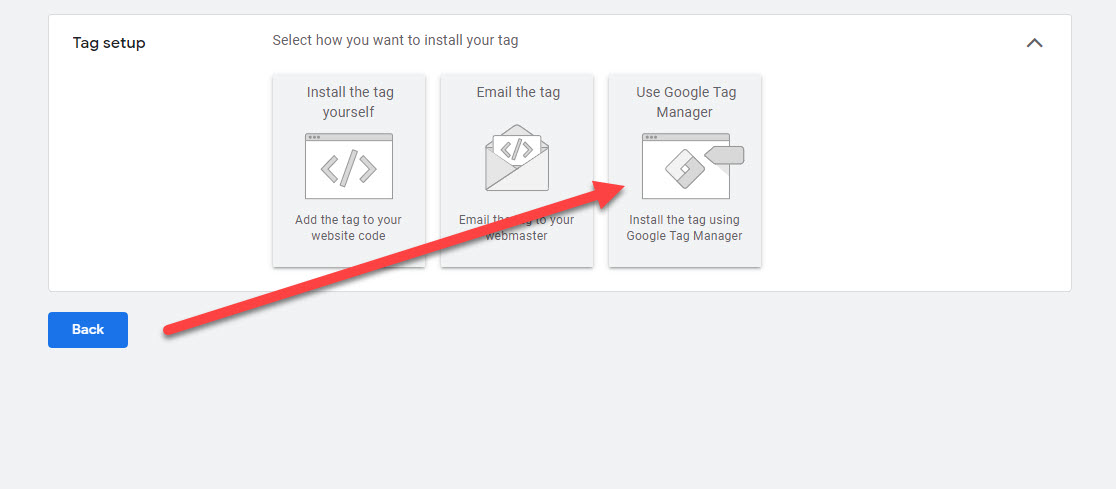
Step 6: Next, you’re going to be asked how you want to install your tag. In this example, we’re going to select “Use Google Tag Manager” to get the details needed to set this up in Google Tag Manager.
Setting up the tag in GTM
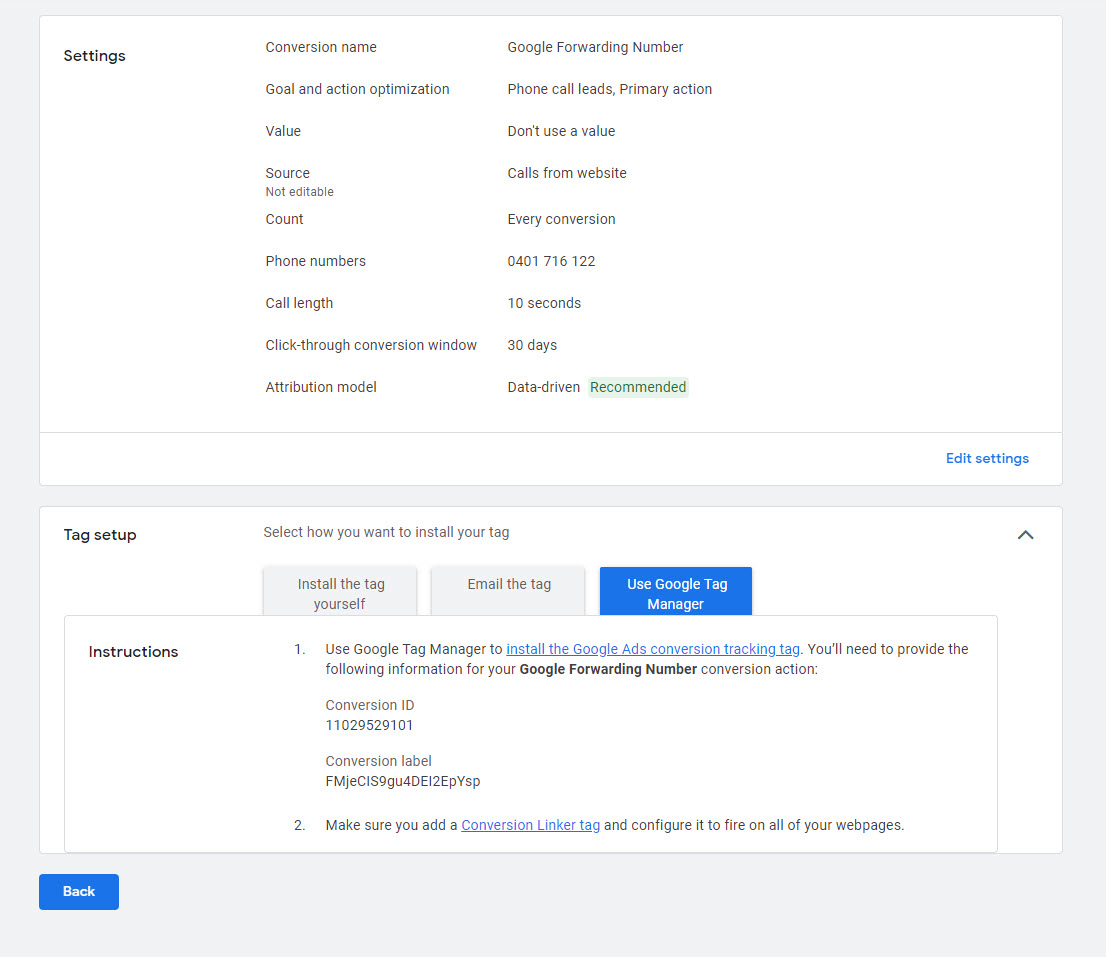
Step 7: Google Ads will now provide us the necessary information to copy and paste over to Google Tag Manager (Conversion ID and Conversion label), so keep this window open for now.
Step 8: Go into Google Tag Manager and create a new tag.
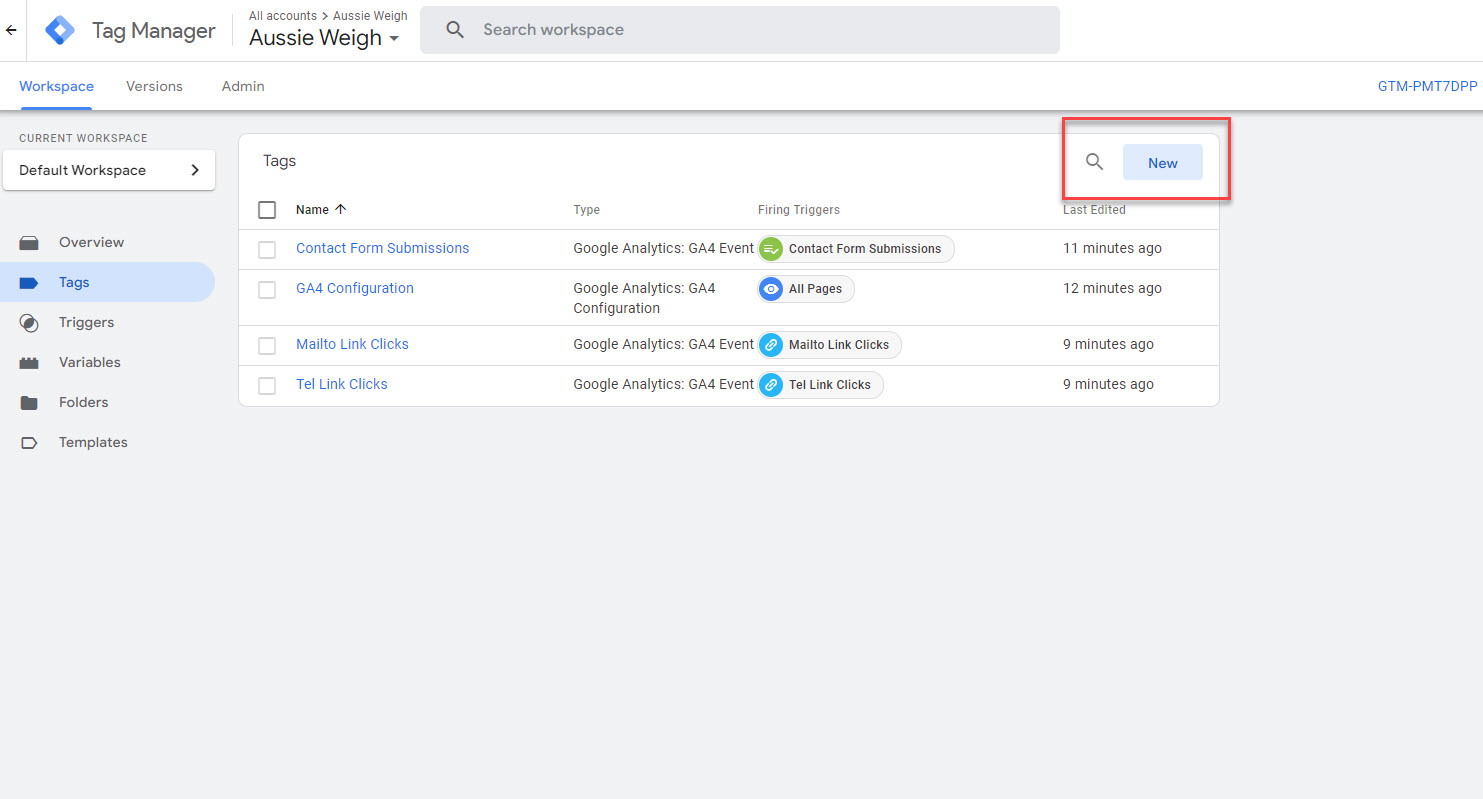
Step 9: Click on “Tag Configuration”.
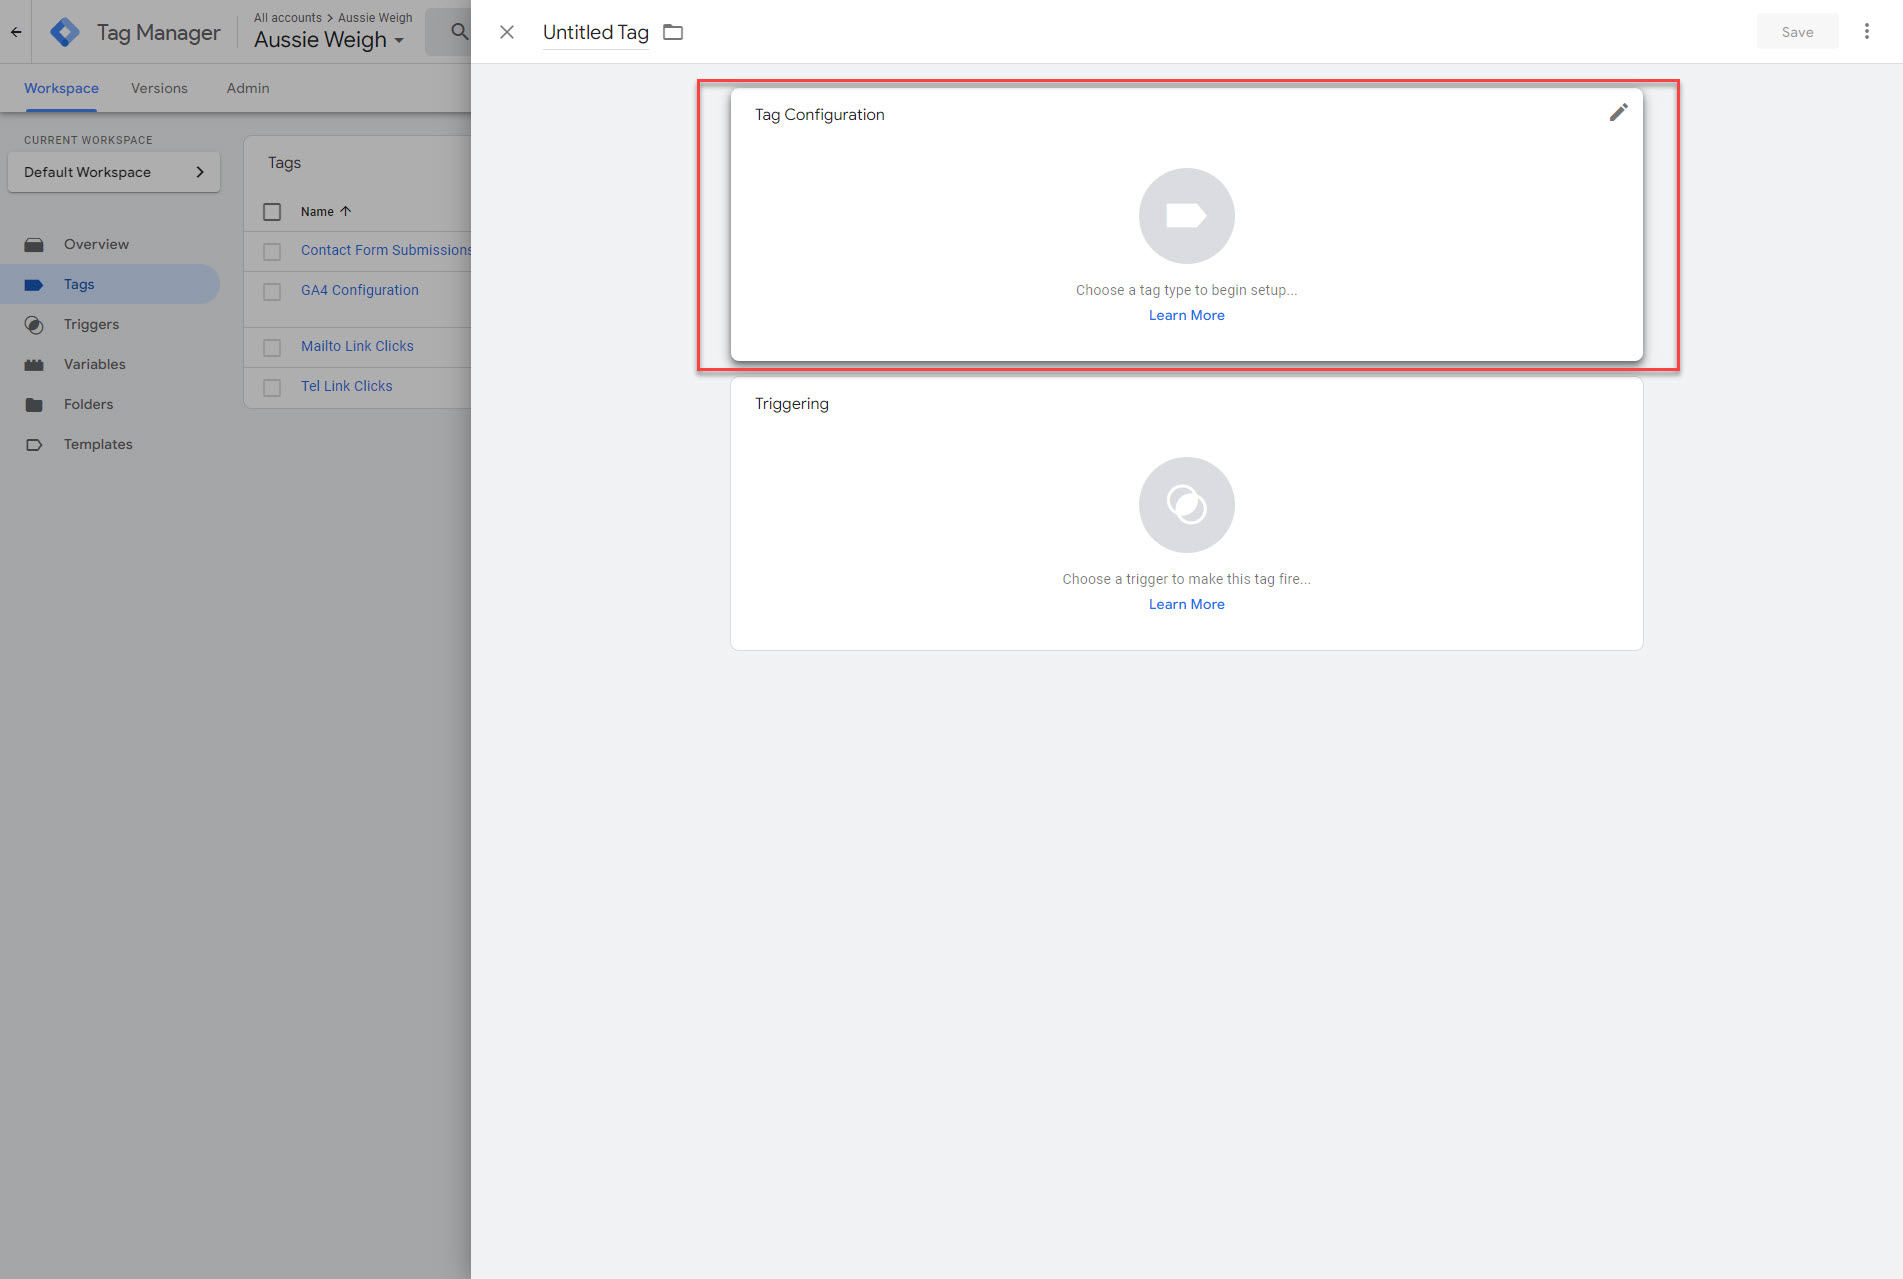
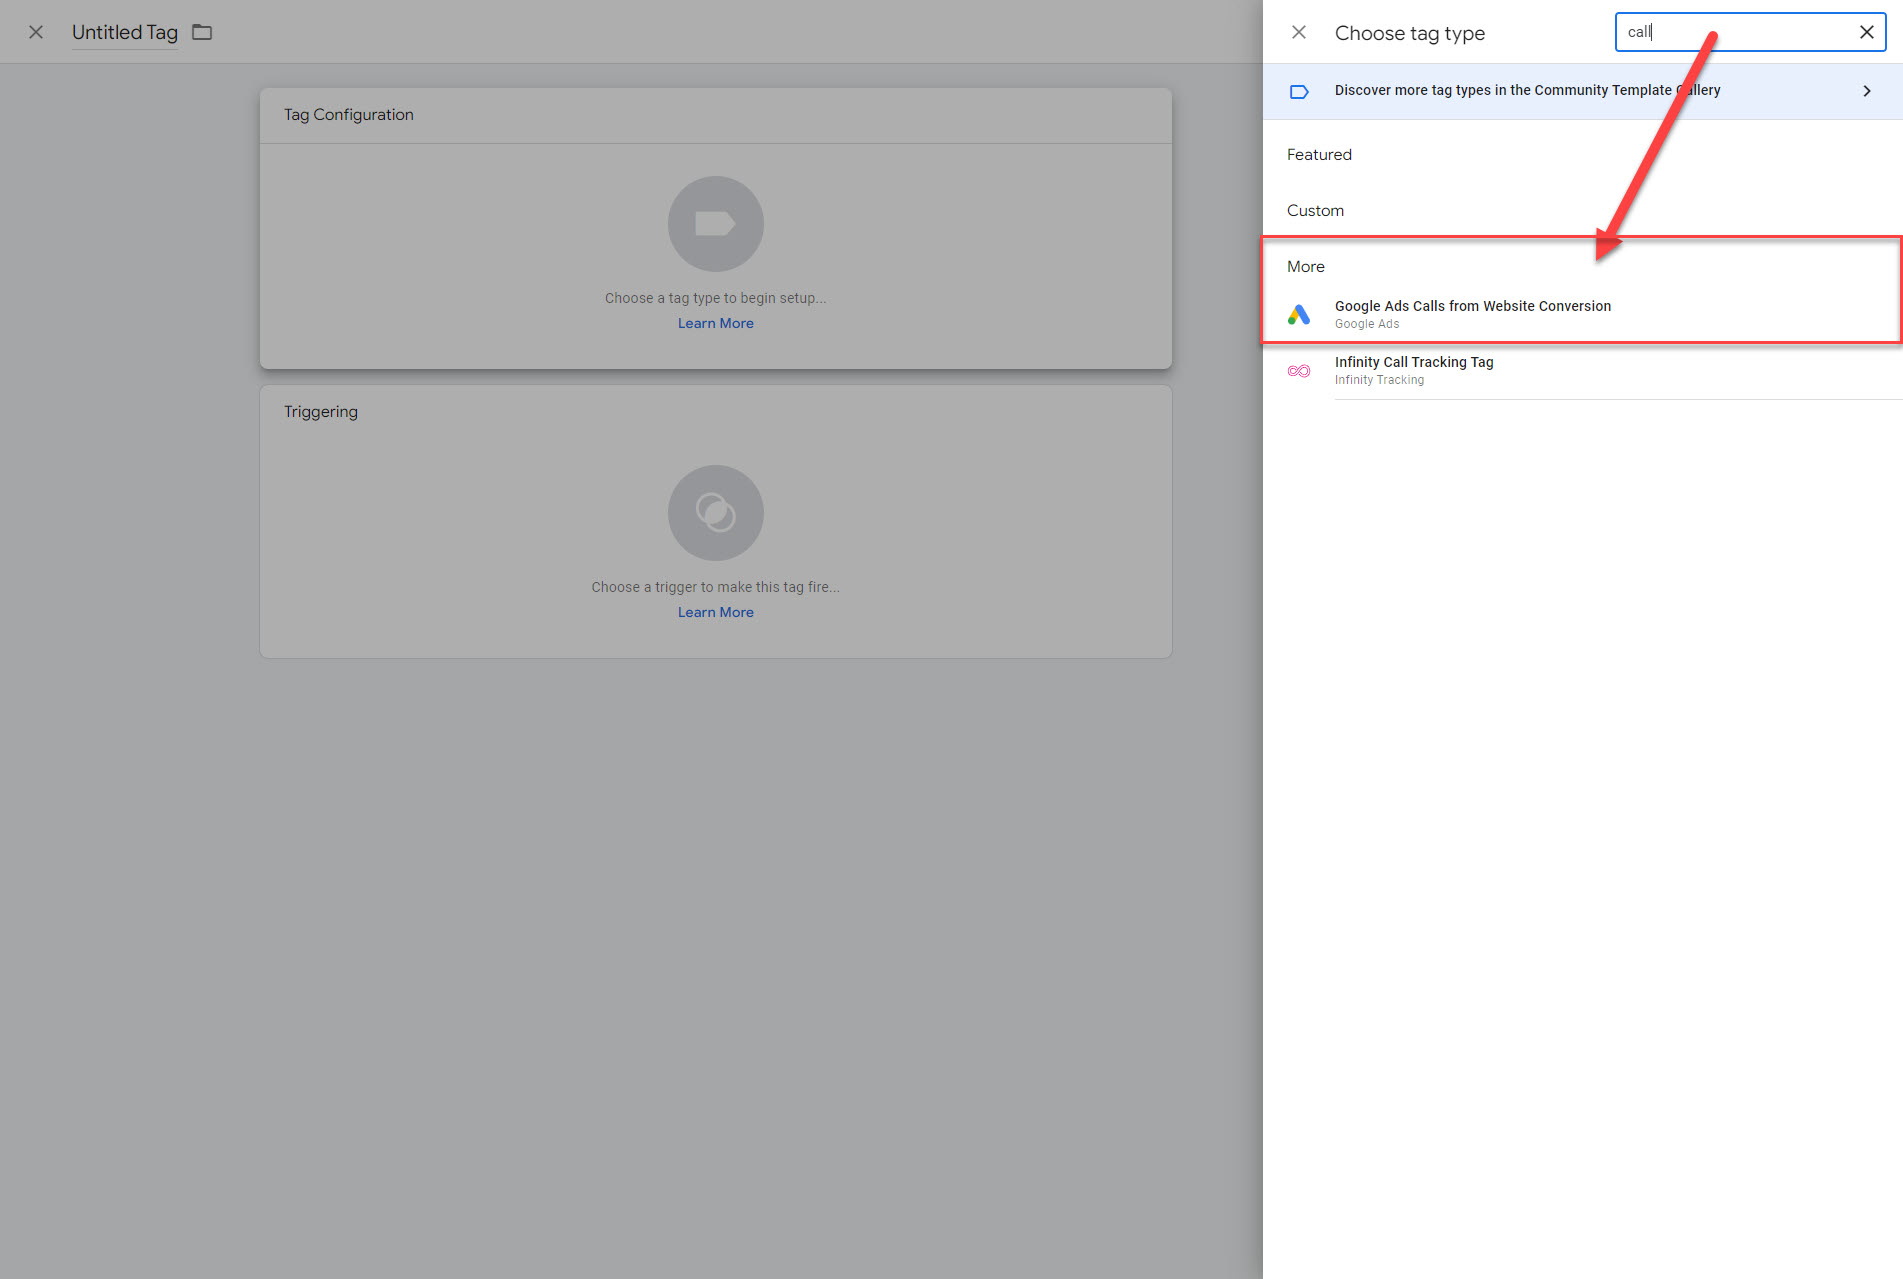
Step 10: Because this goal is not immediately visible, we’ll use the search function in the top right to get to it quickly.

Step 11: Just by putting “call” into the search box, you’ll now see the Tag “Google Ads Calls from Website Conversion”. Let’s click on that.
Step 12: Go ahead and copy/paste the Conversion ID and Conversion Label from Google Ads (from Step 7).
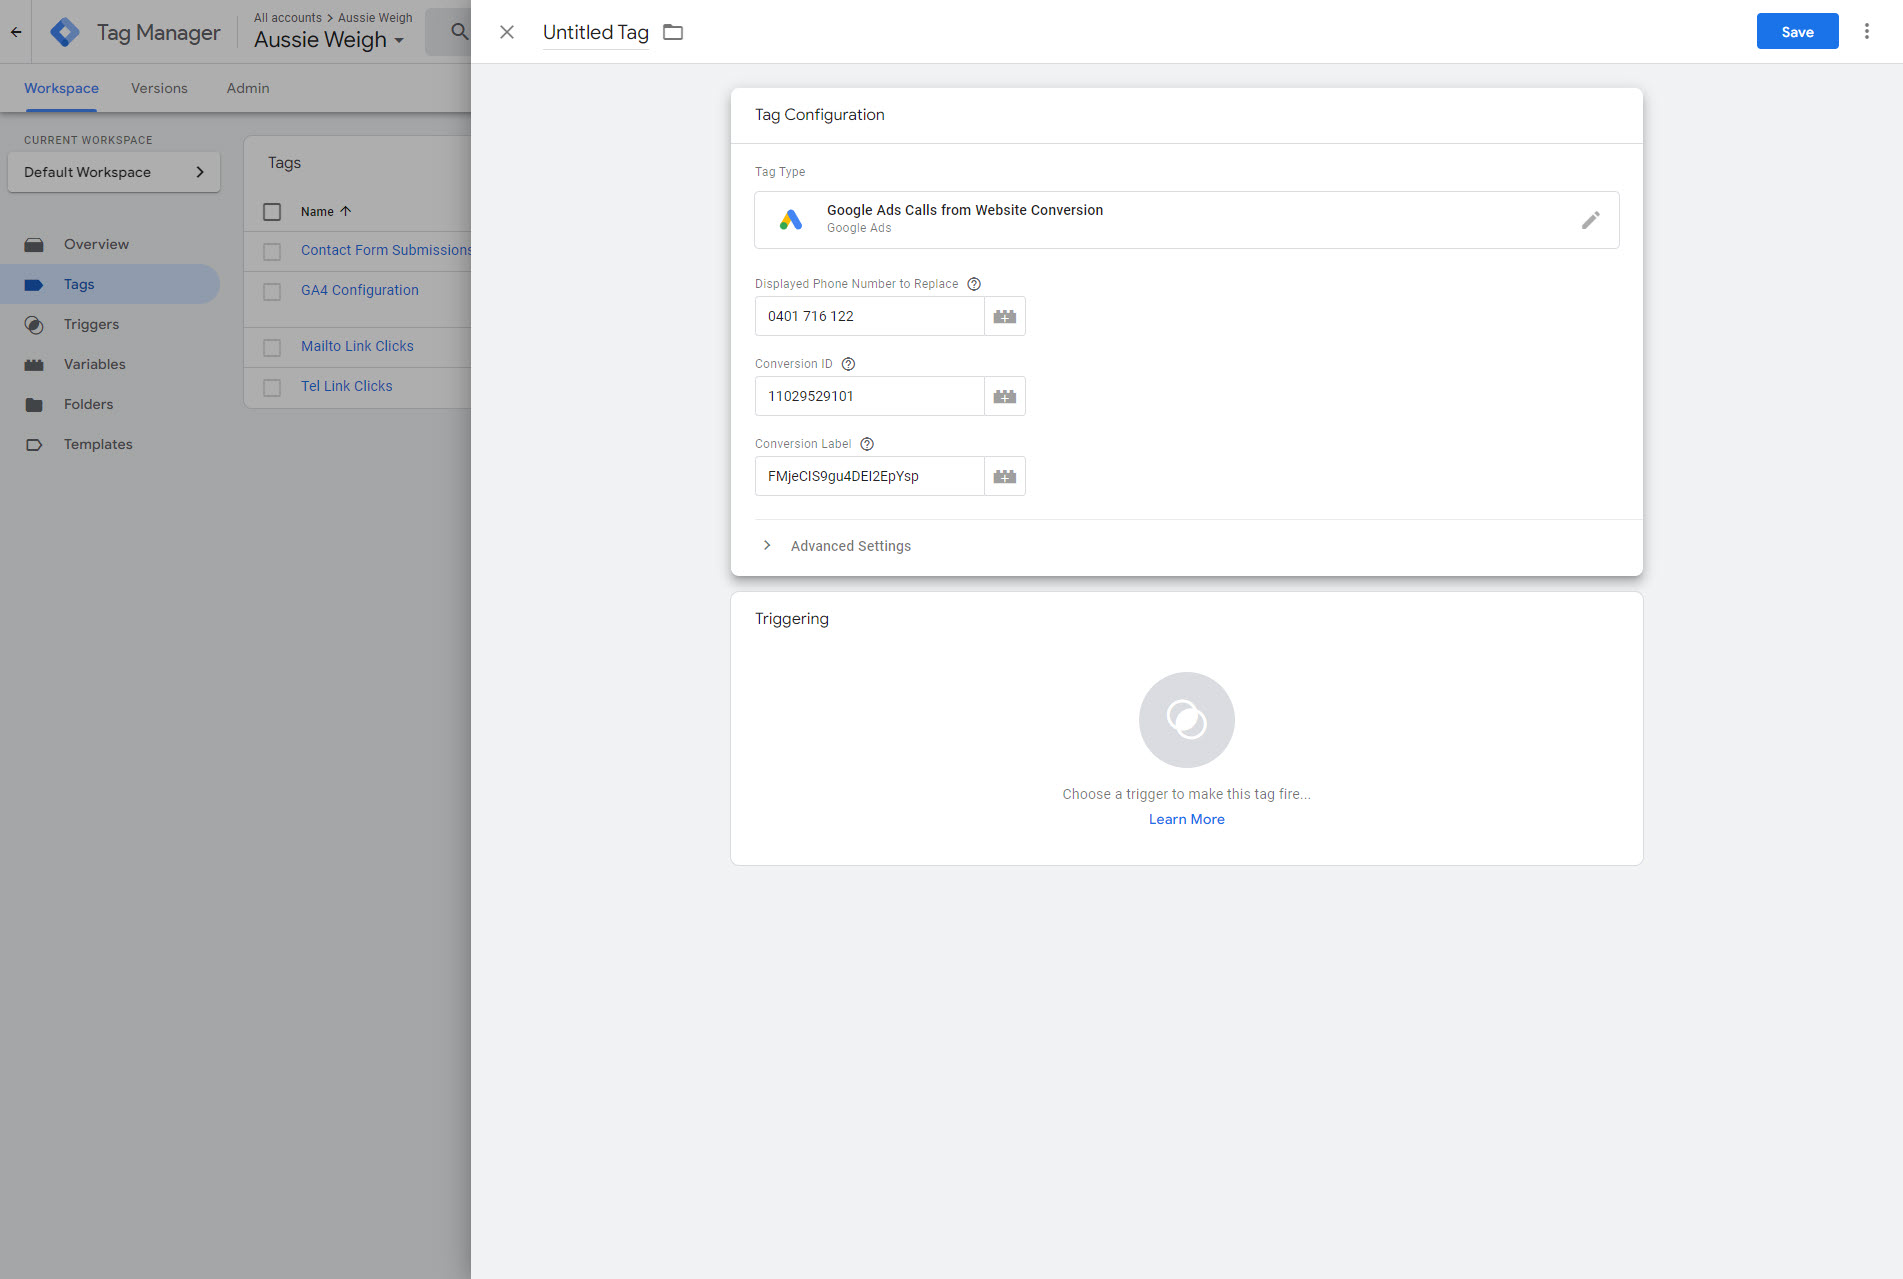
Step 12: Click on “Trigger” and select “All Pages”.
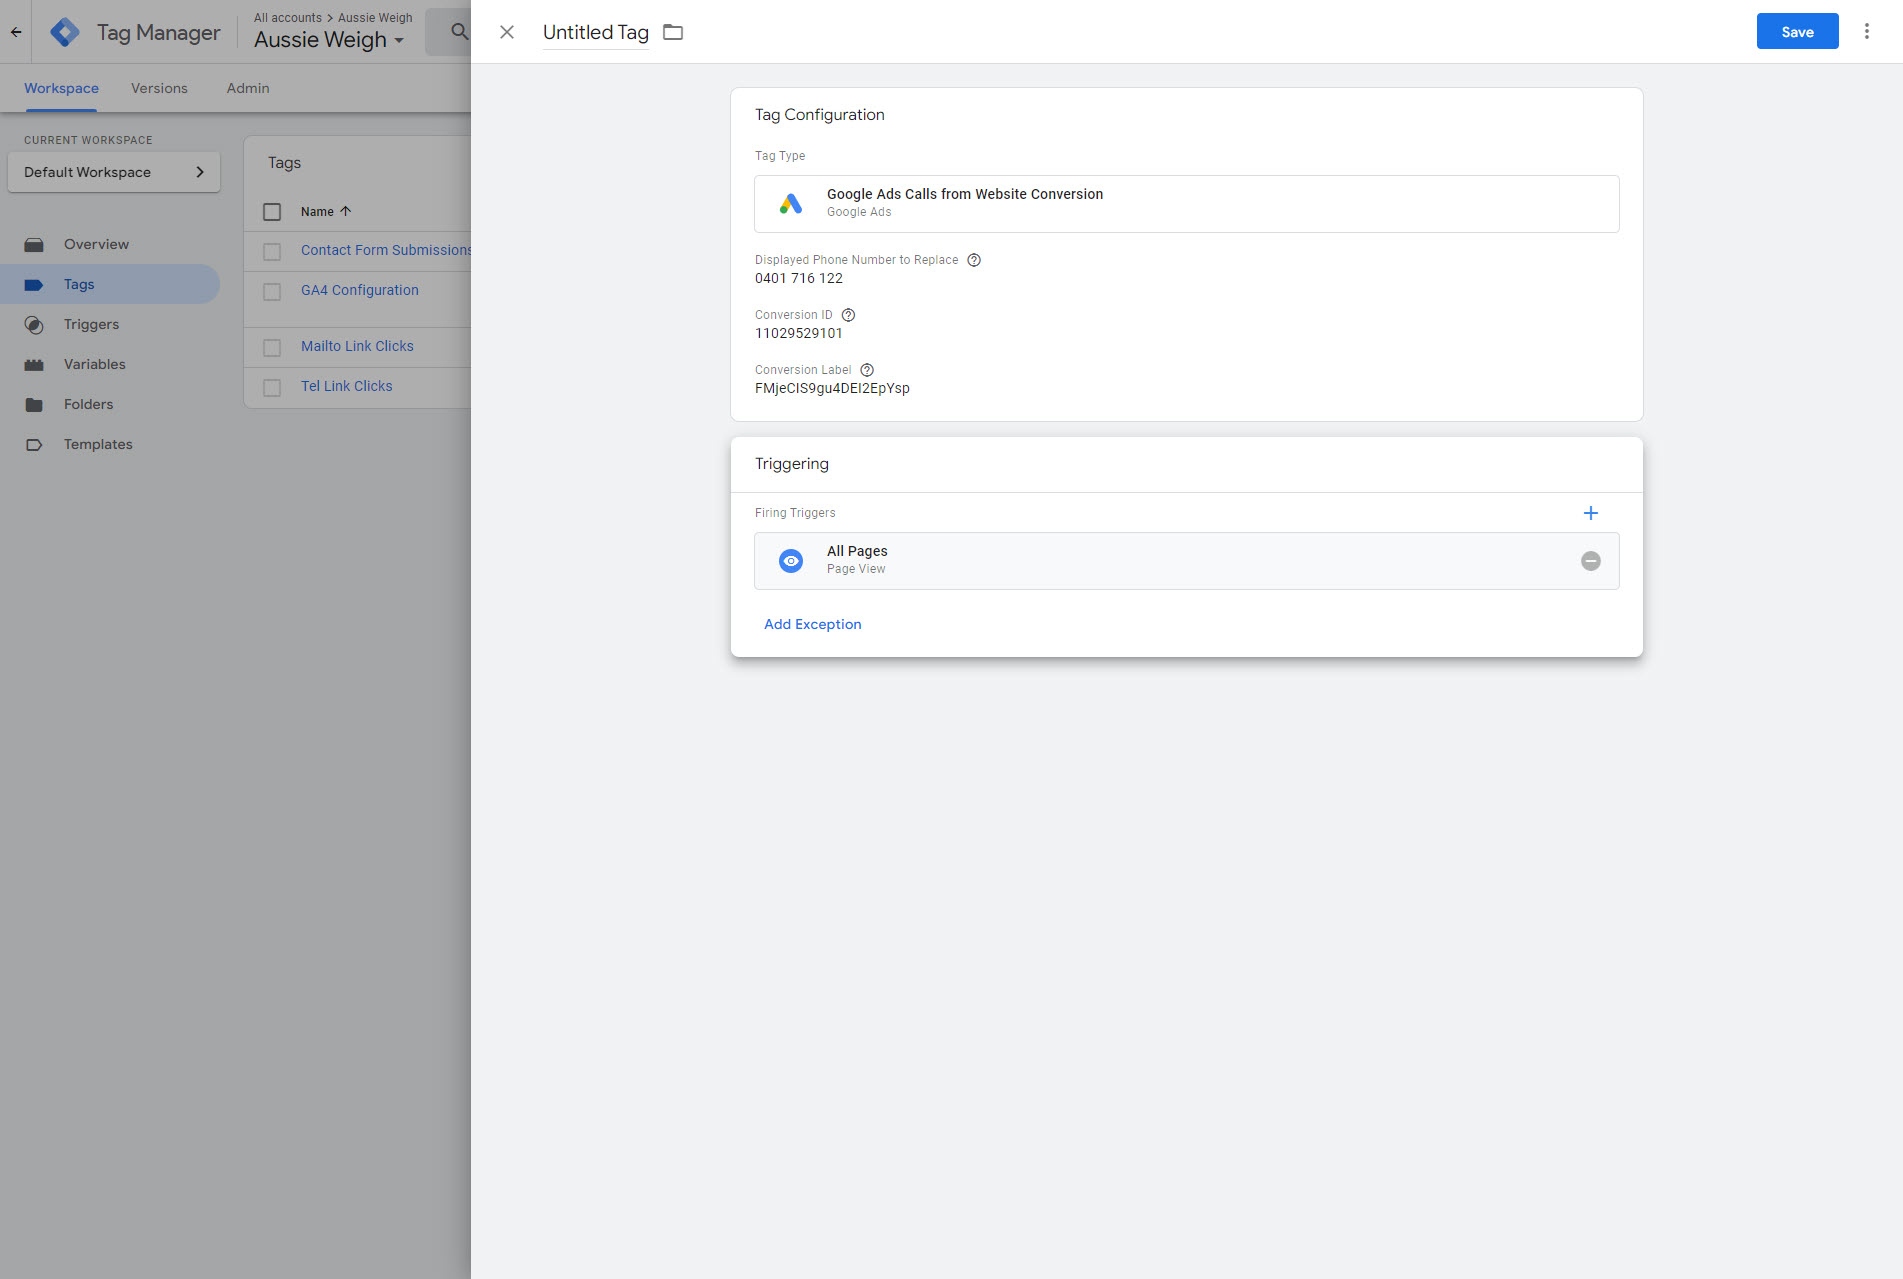
Step 13: Give your Tag a name and click Save in the top right corner.
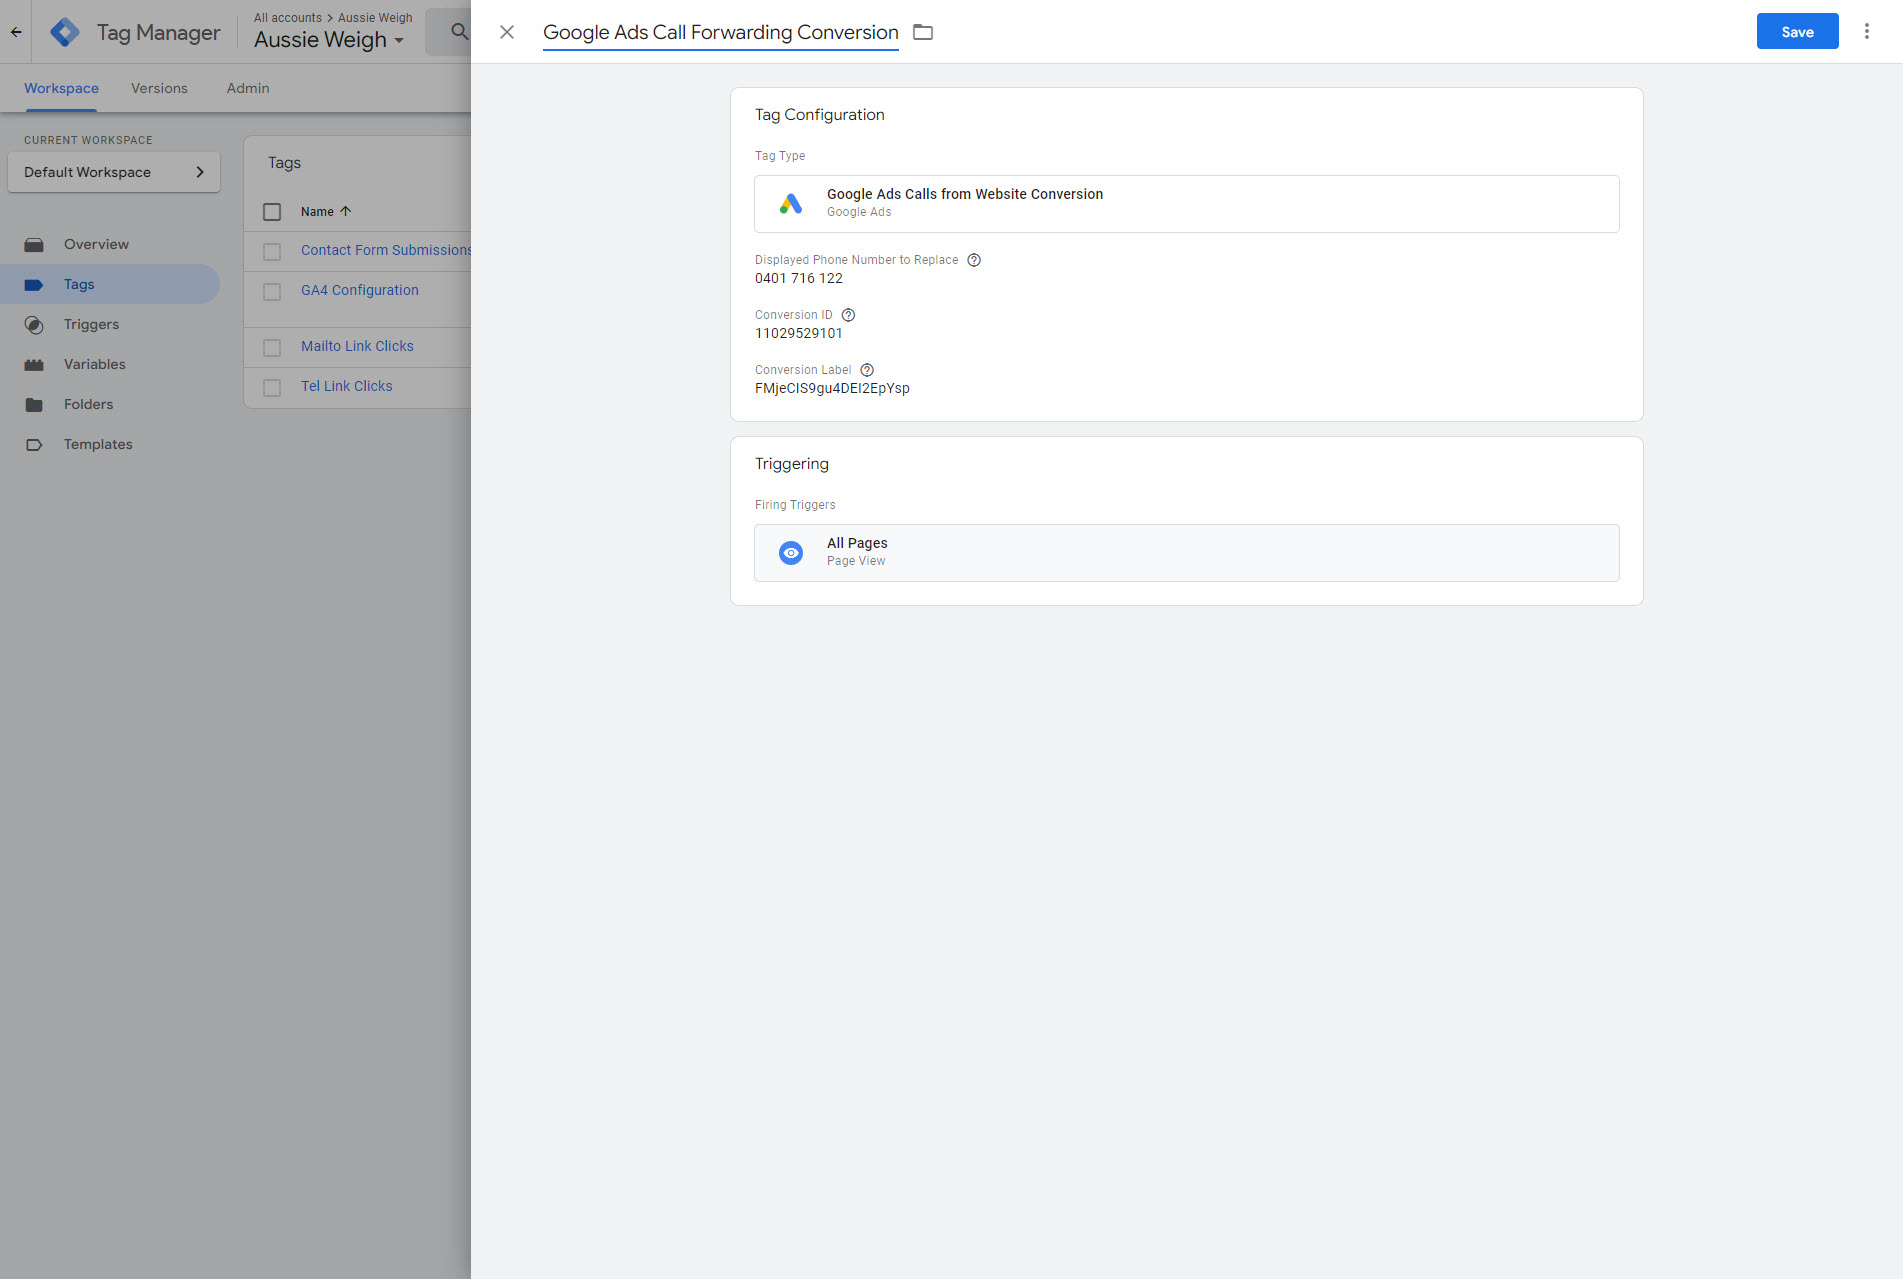
Great, the tag is there – but it’s not going to work for this client just yet because I haven’t set up a “Conversion Linker”.

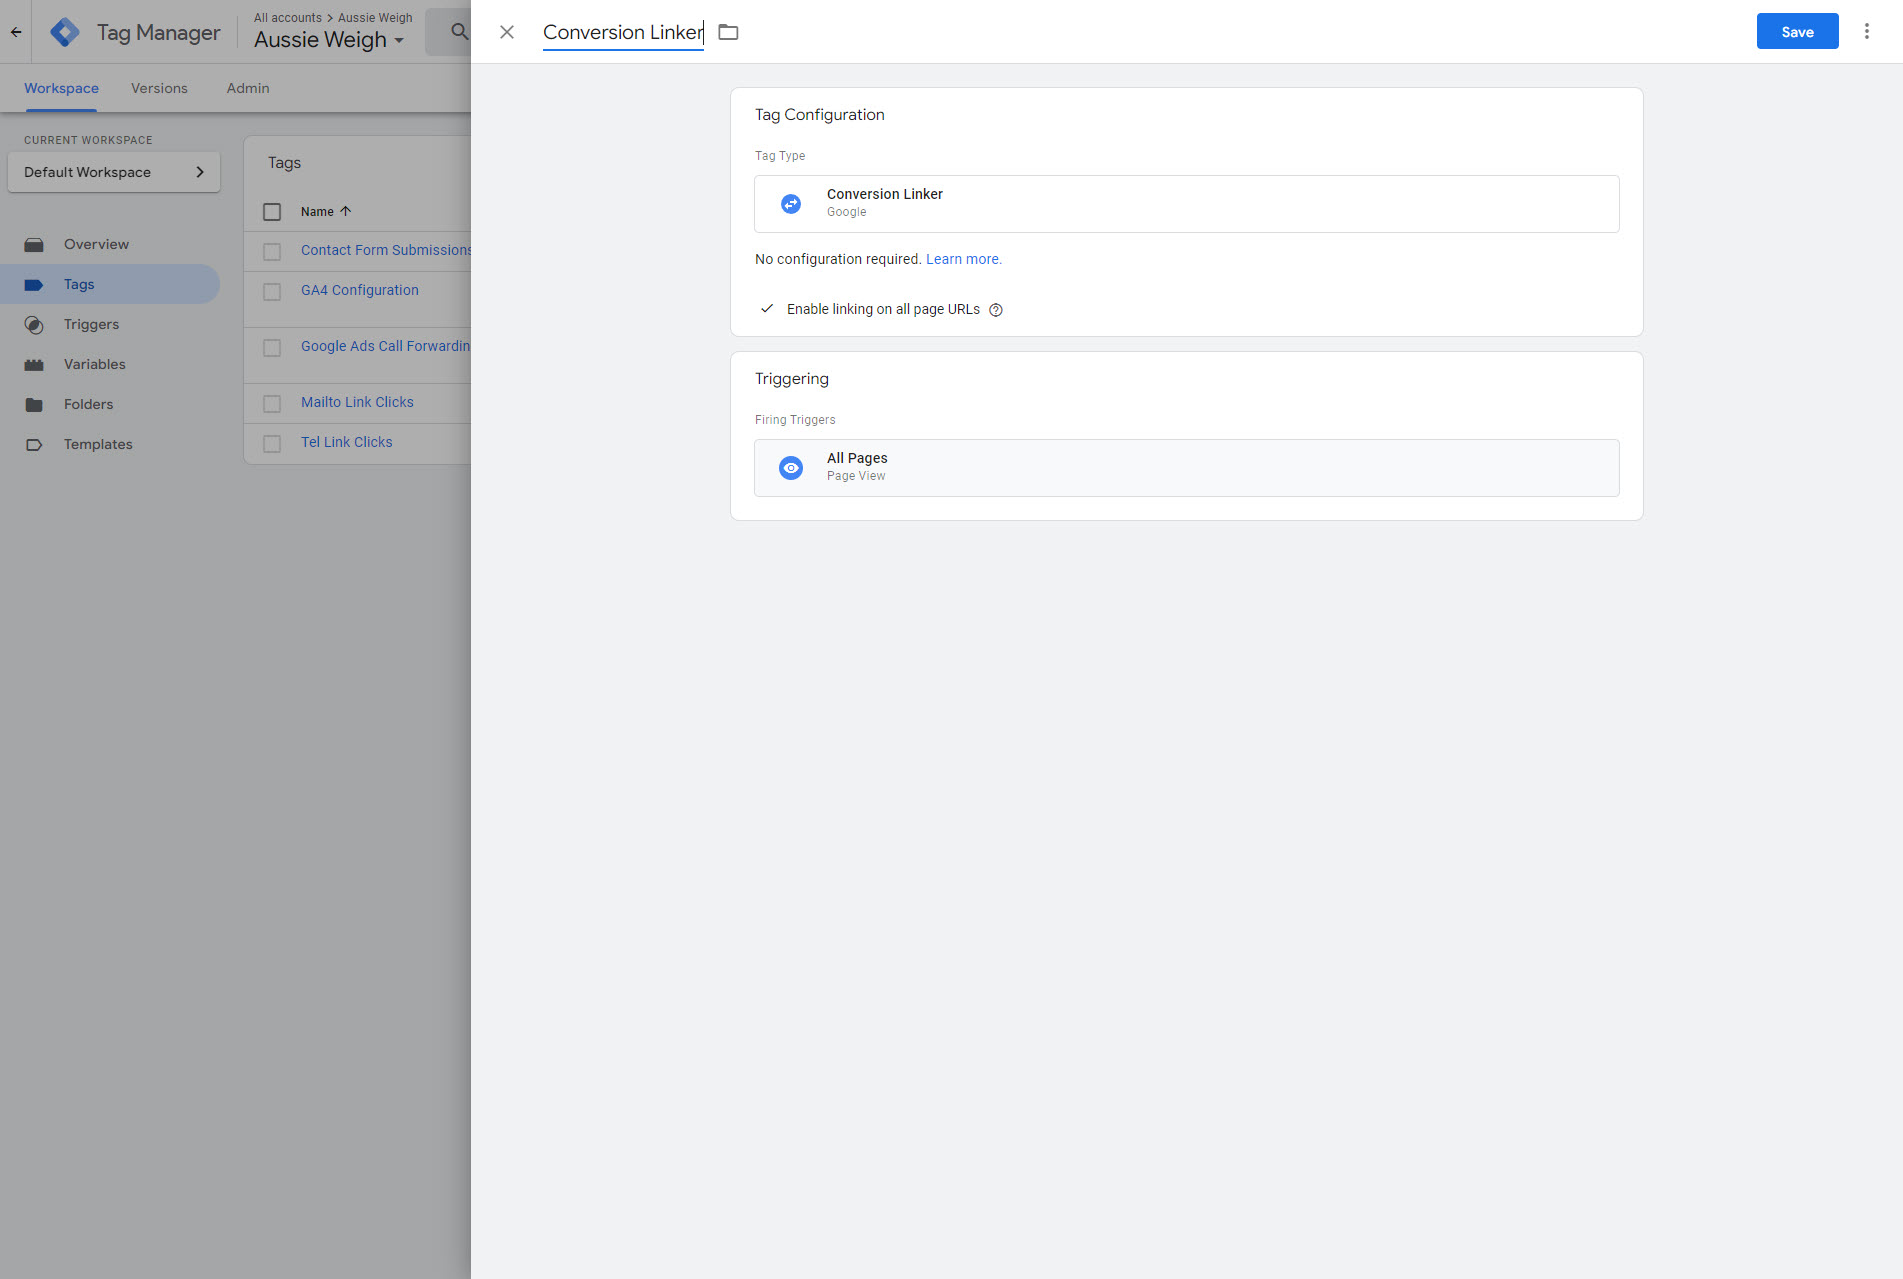
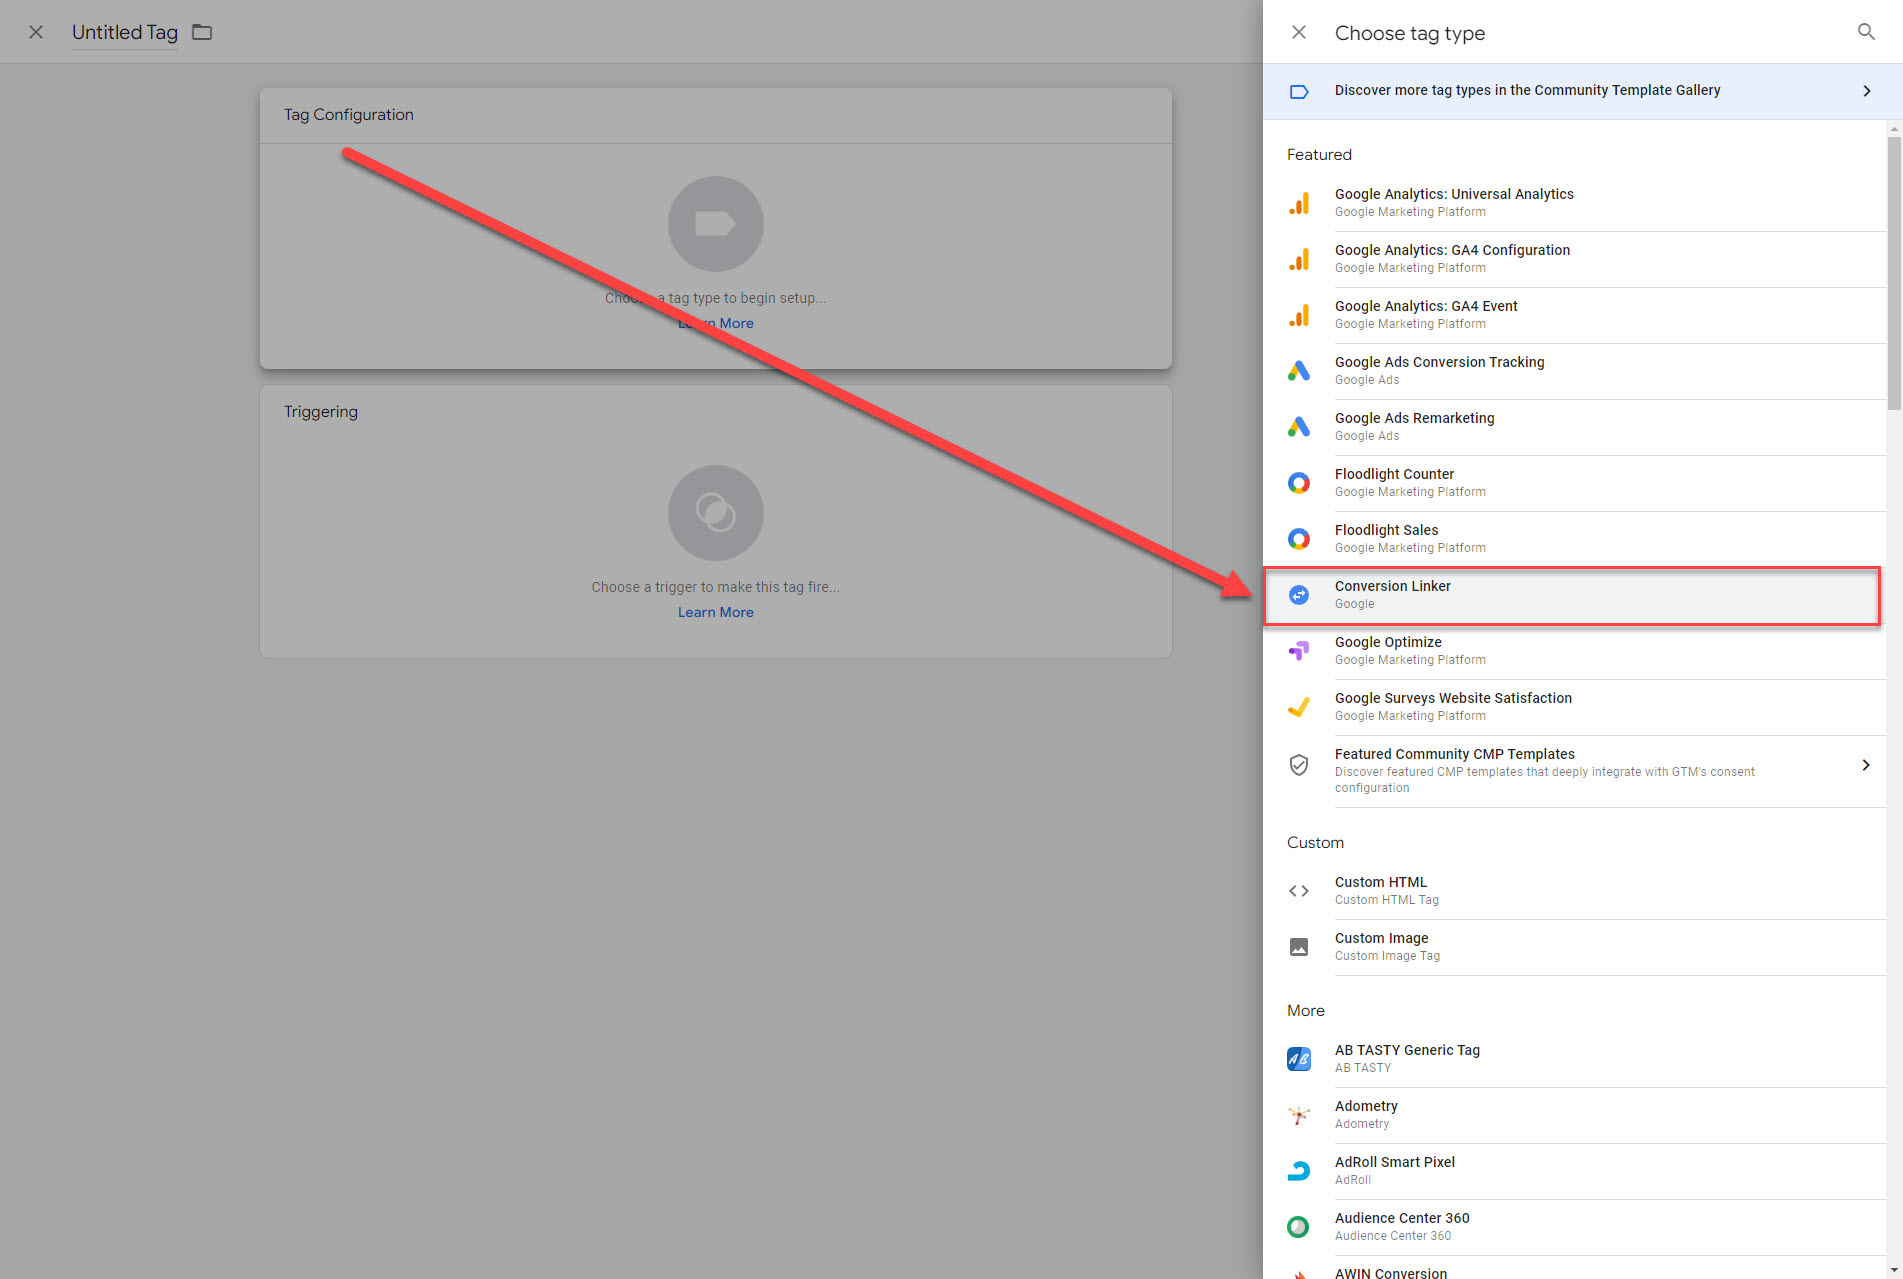
Conversion Linker
Step 14: Create a new Tag and click “Conversion Linker”
Step 15: Make sure that you tick “Enable linking on all page URLs”. Then, select “All Pages” under Triggering.